

Blog - Getting street legal with a WD Electronics Street Legal Kit - Part 5
Before my trip to Moab, I had to get my machine street legal so I could drive to and from all the trails. My go-to has been WD Electronics for the last few years. I like their kits because they are complete with lighted license plate brackets and the horn, they are plug and play, and they also have complete headlight replacement kits with integrated turn signals in the lights so you don't have to drill holes for any cheesy blinkers. The instructions are great and color printed. There are a few little things that are open to interpretation that I took pics of in case it helps anyone. Consider ordering your WD Electronics from us here at RockPeak UTV.
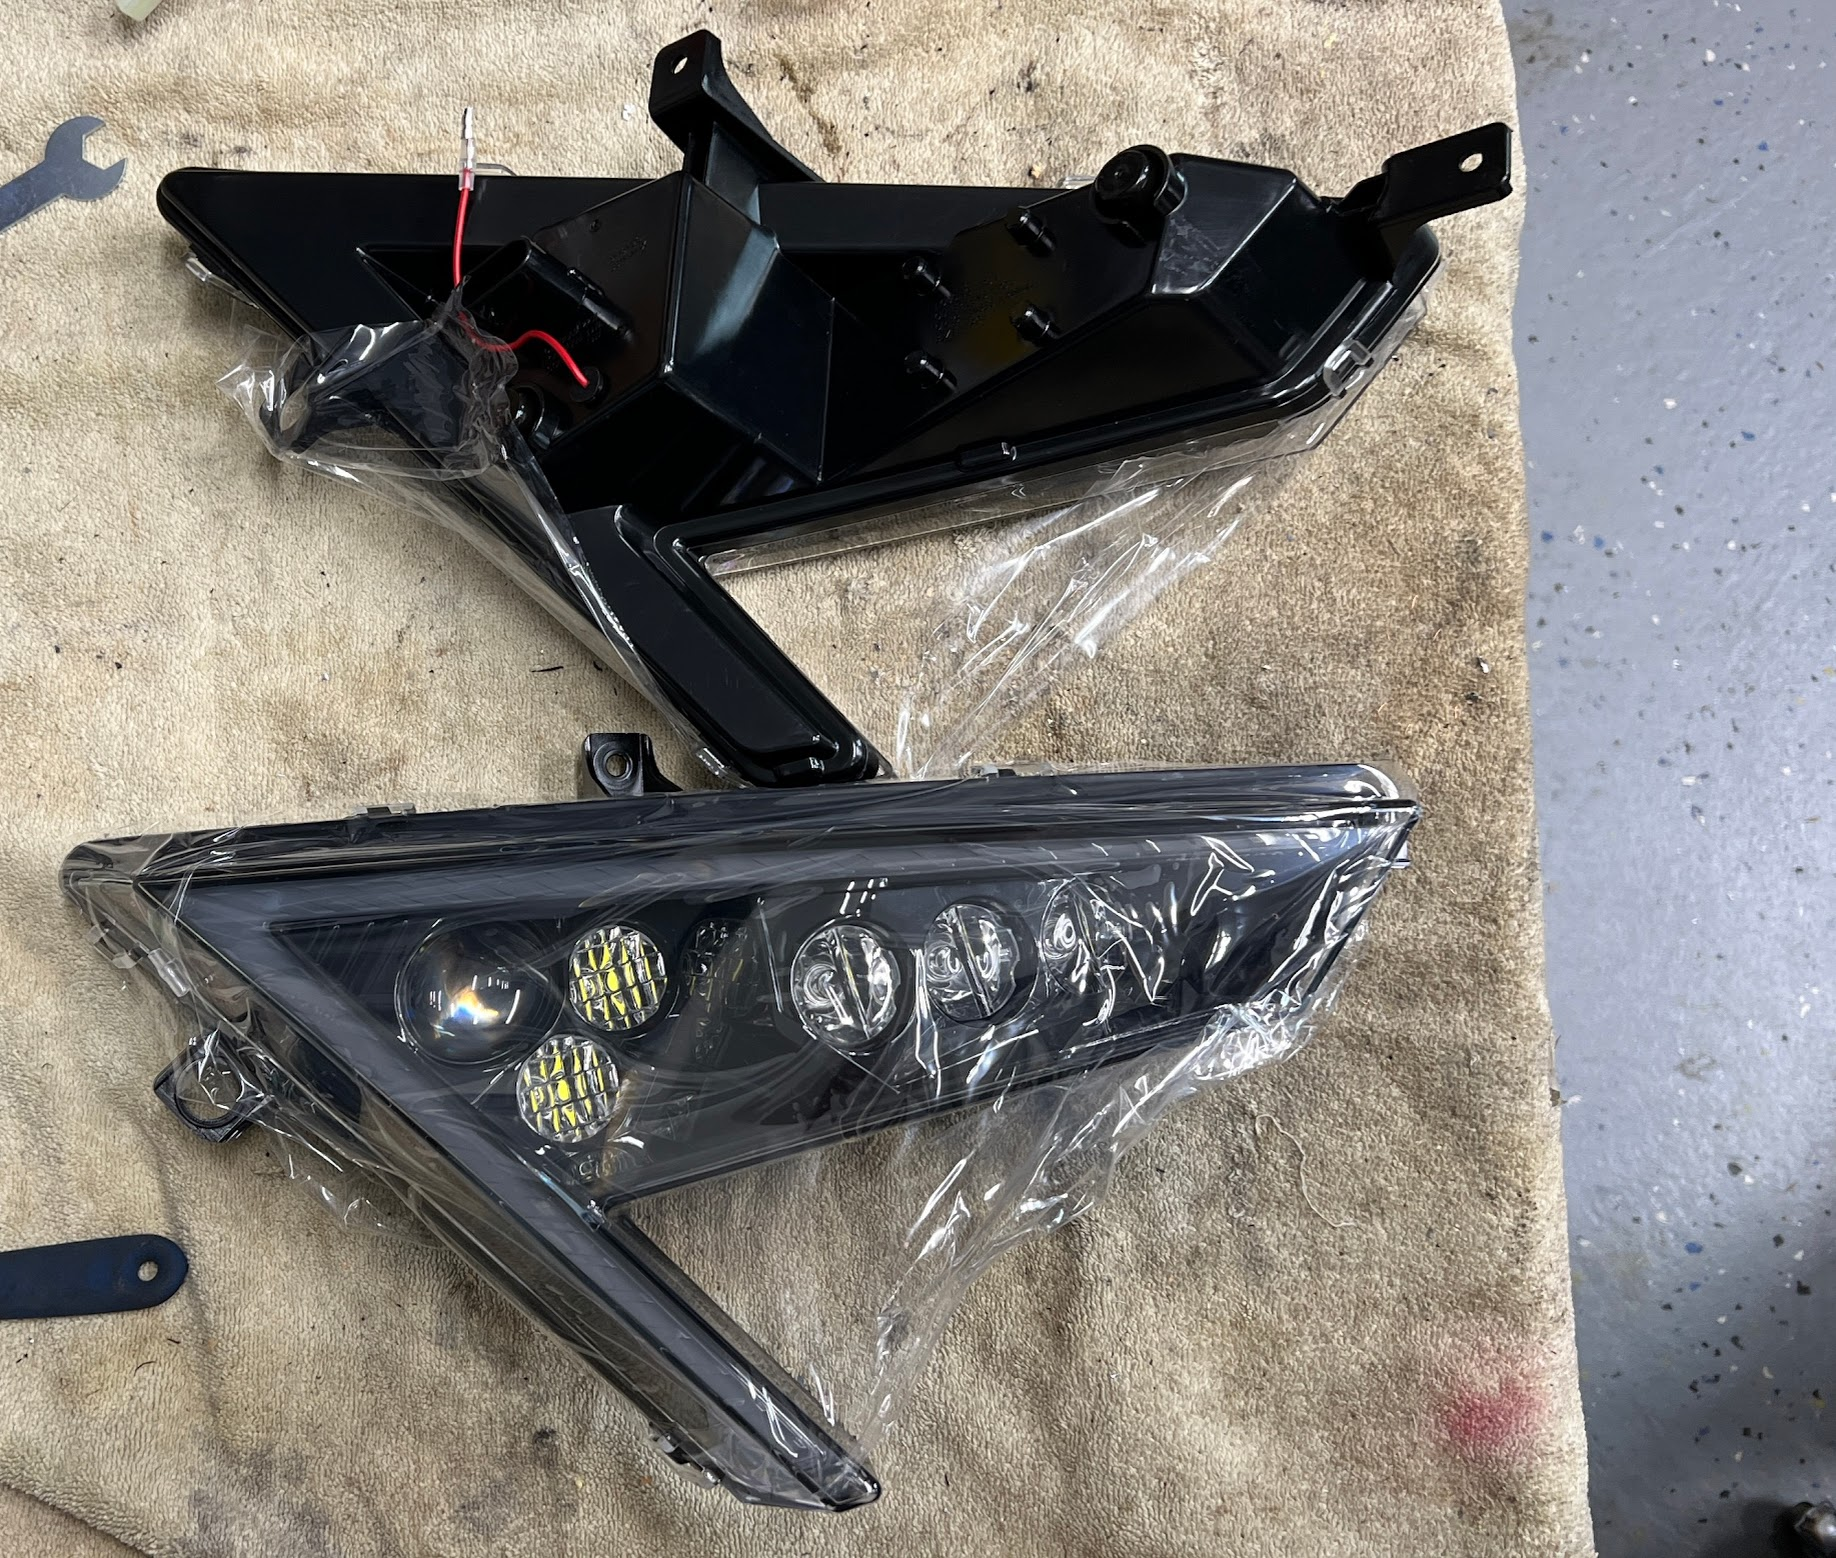
I get a lot of questions about the replacement headlights, other than the wire to trigger for the integrated blinkers, they look damn near identical to the stock headlights right down to the molding markings. WD claims they are 10% brighter than stock but I didn't get a chance to compare them side by side in the dark with another Turbo R to see.
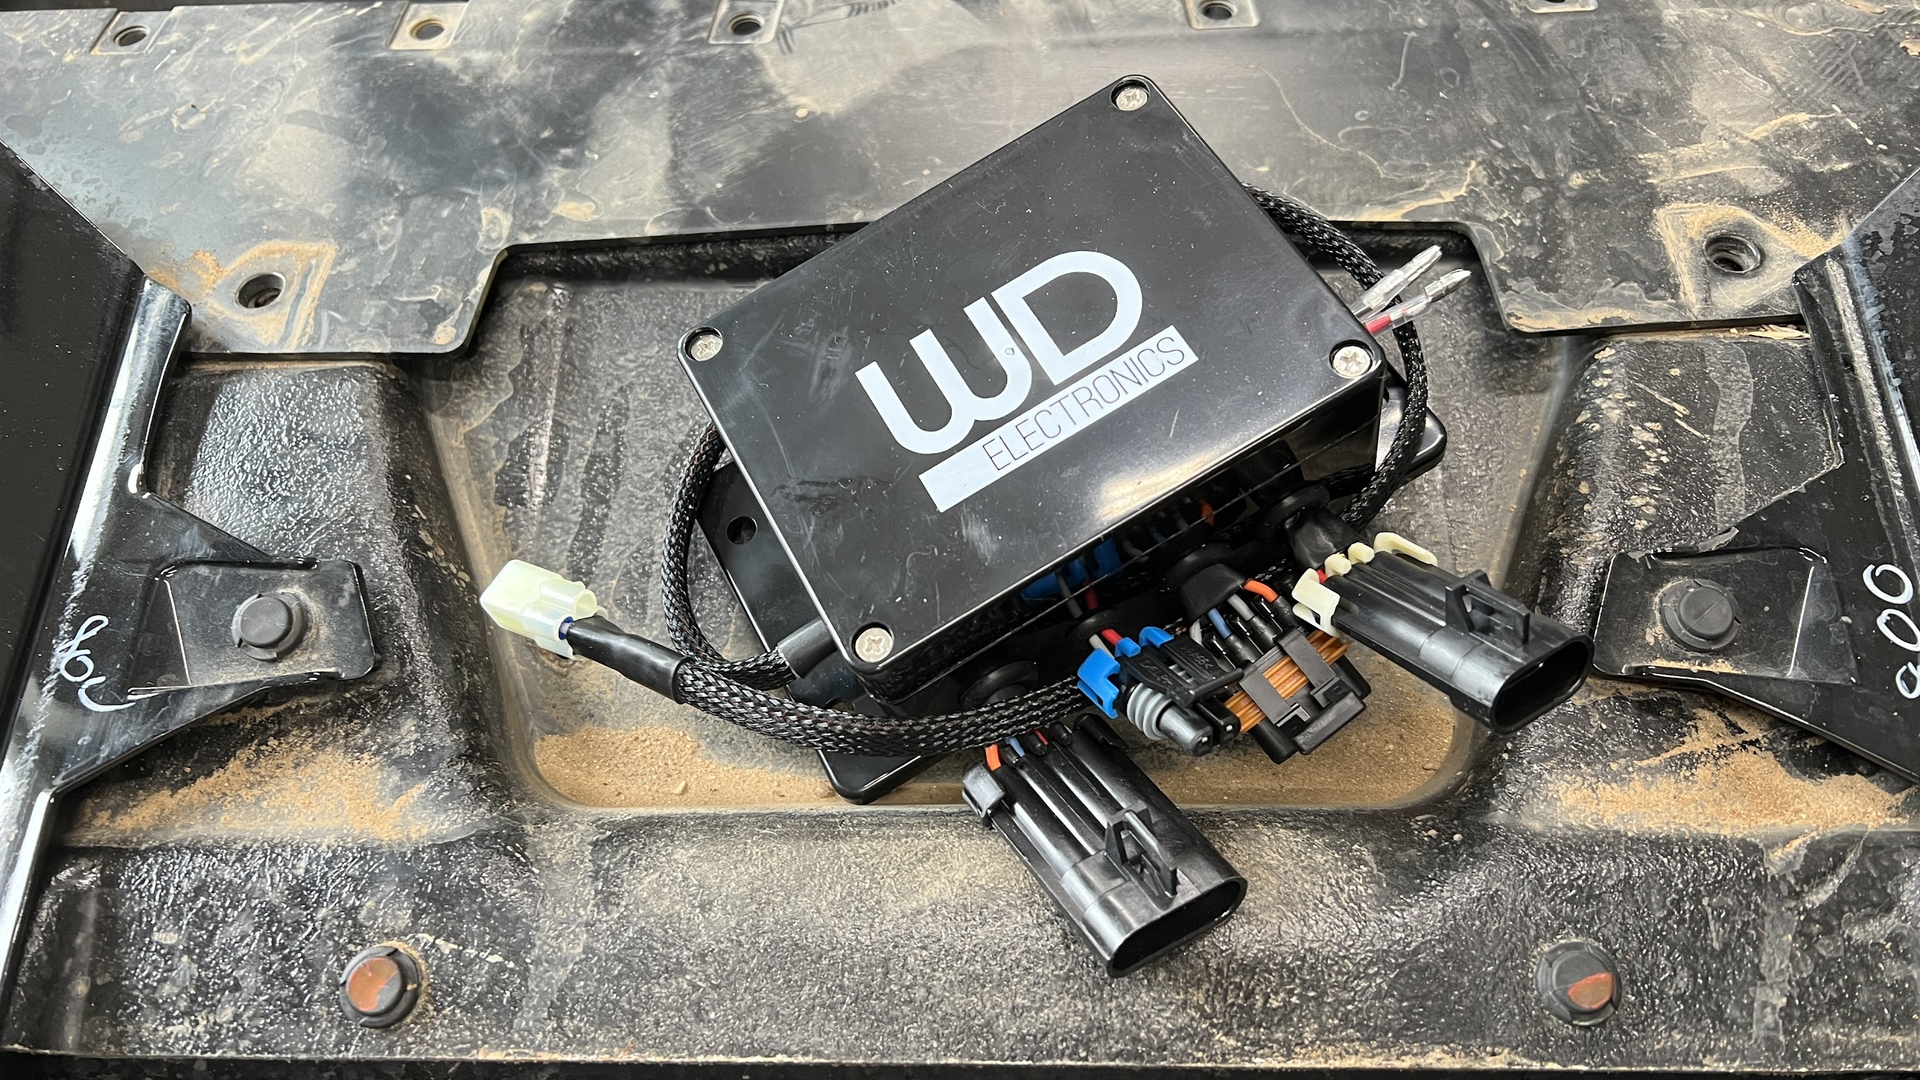
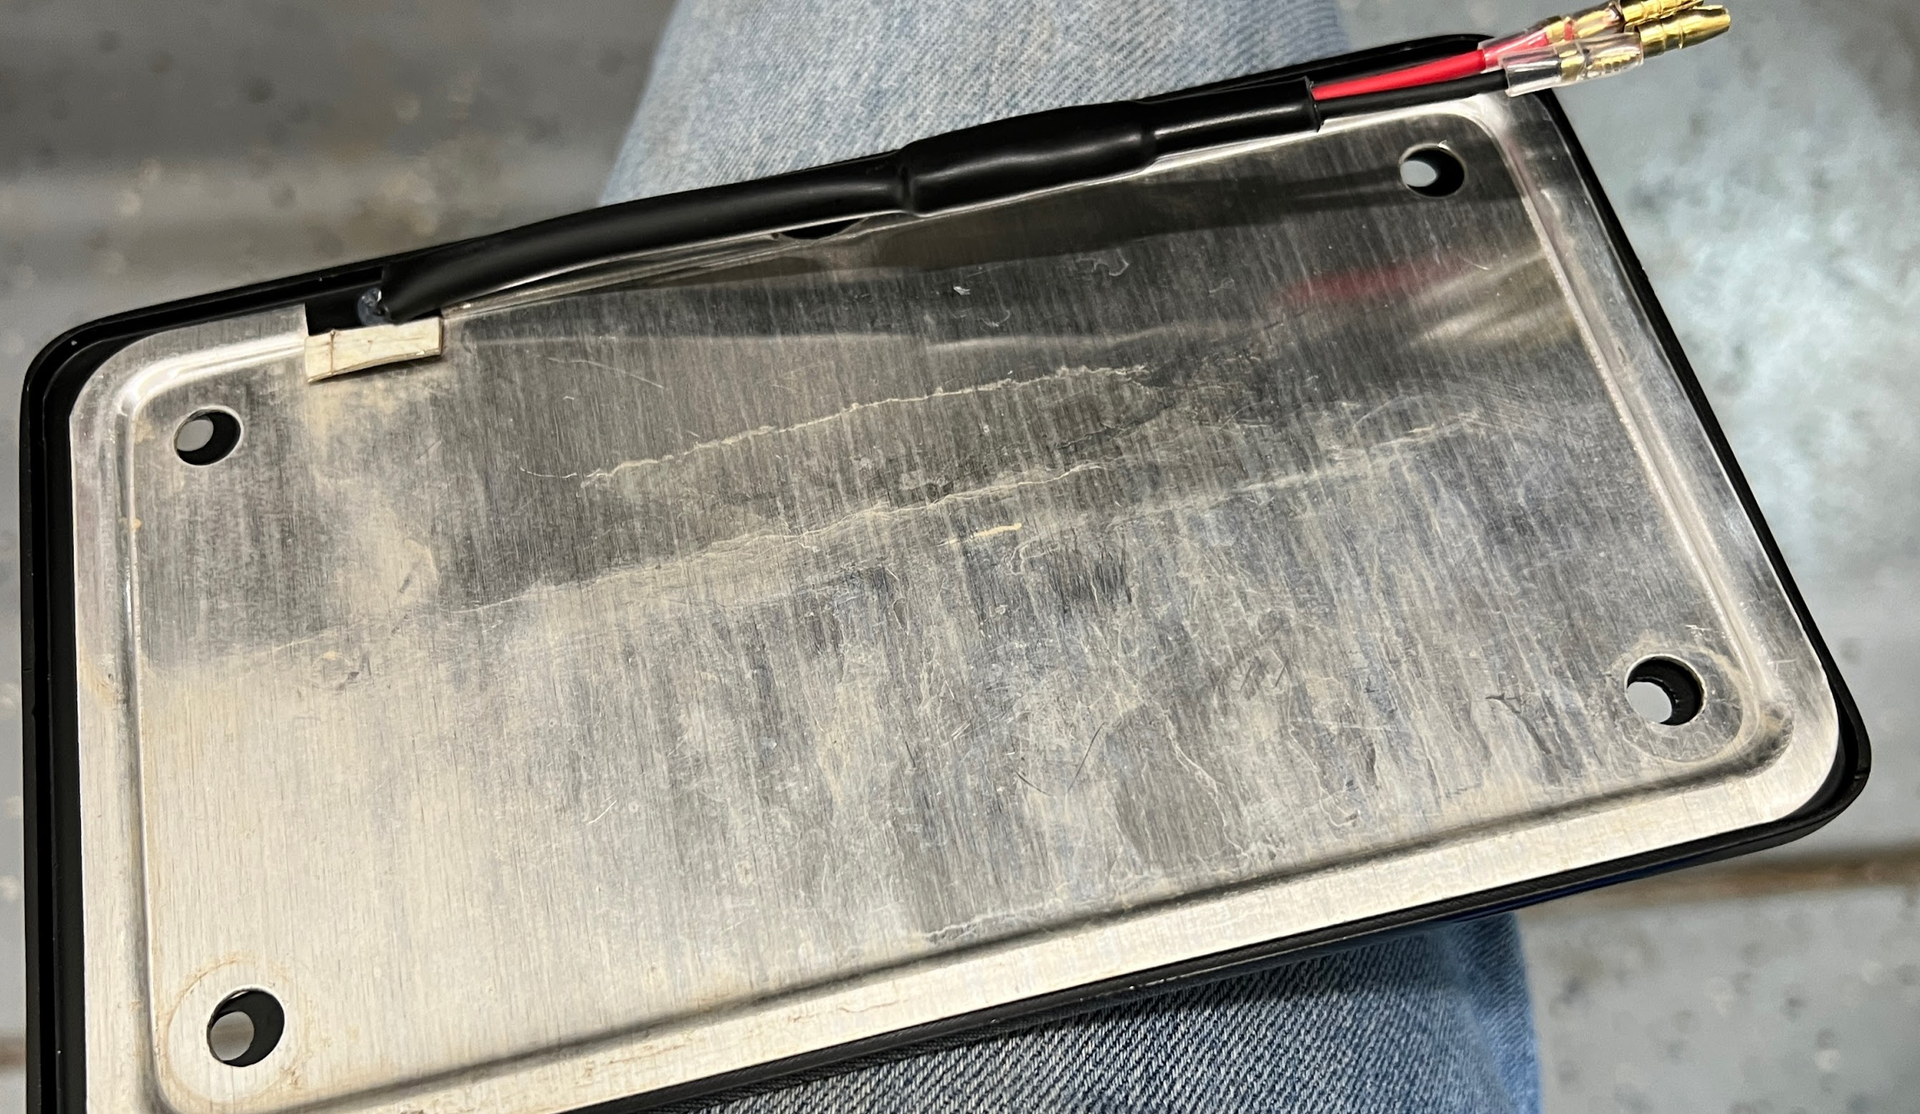
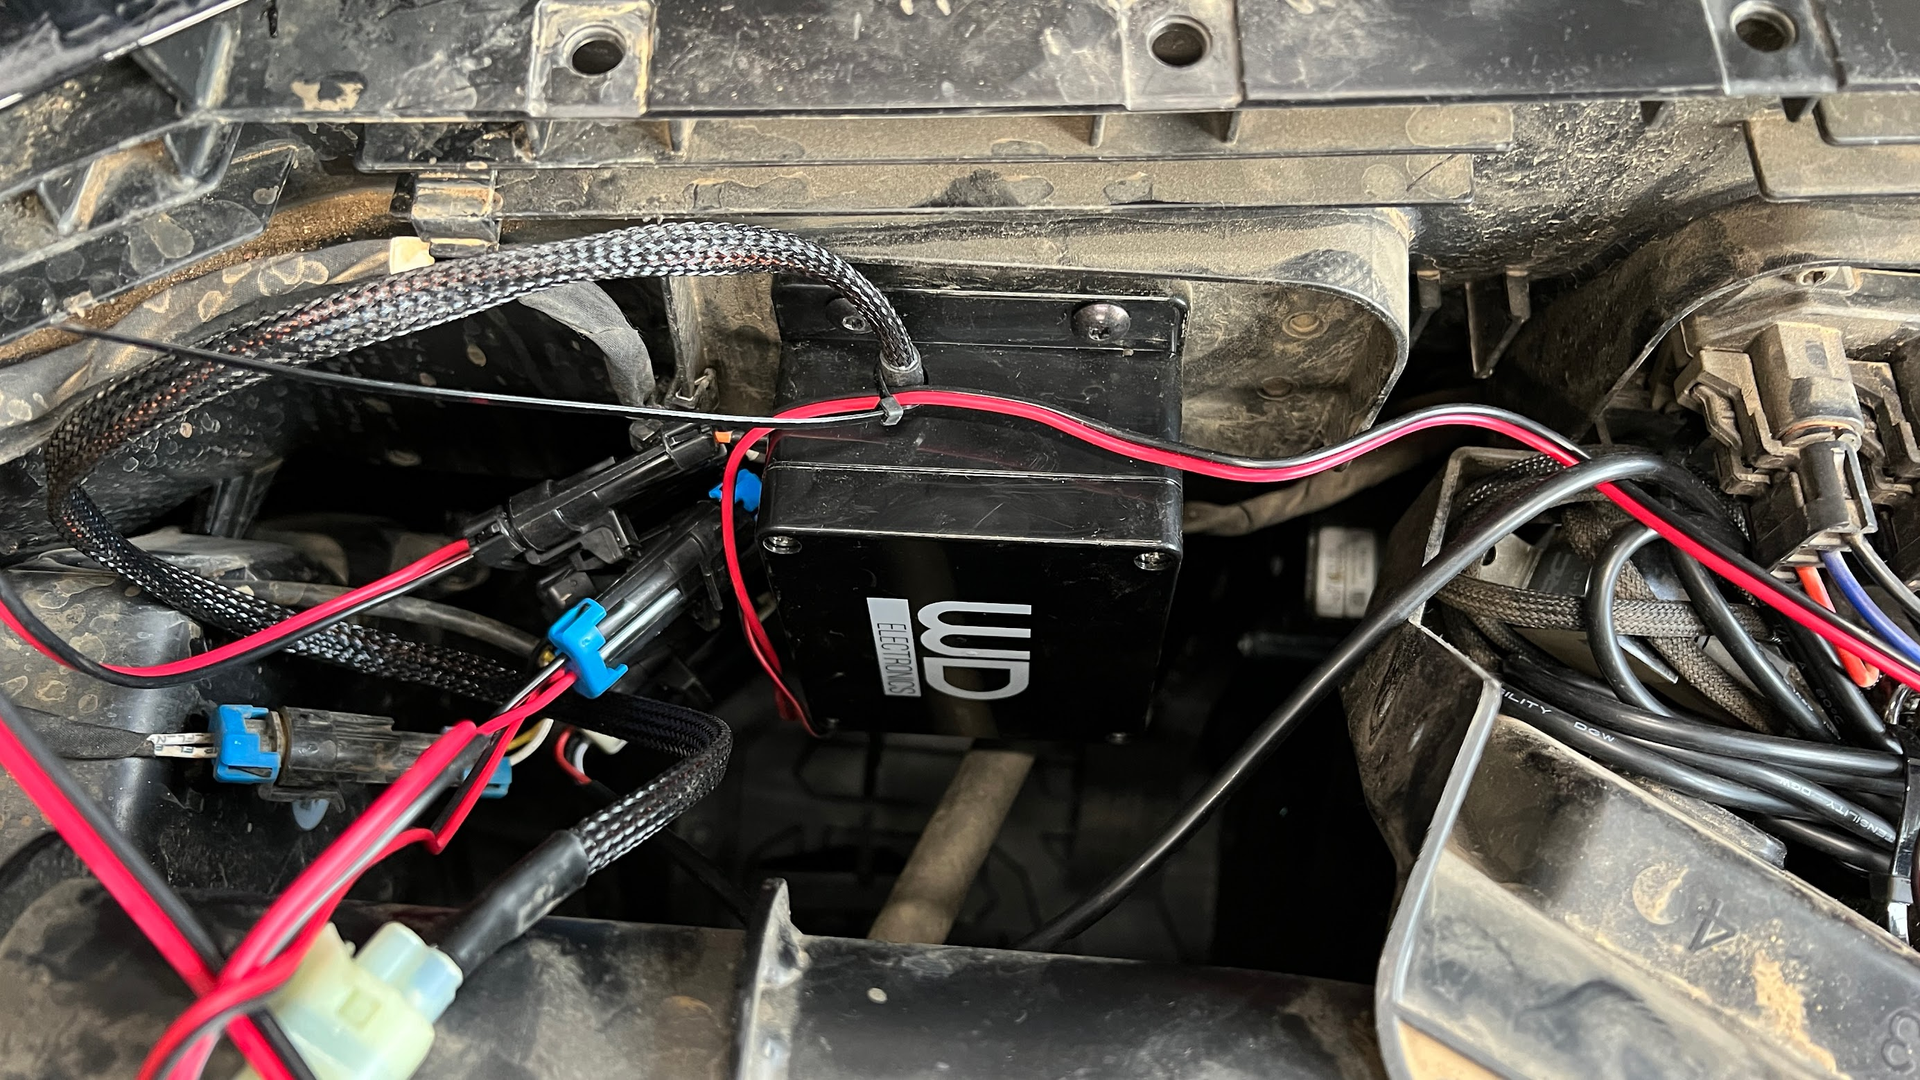
Close up of the control box. Everything has nice weather pack connectors, the bullet connectors are for the power and there is an included pigtail for the bus bar that has bullet connectors installed so it is truly plug and play.
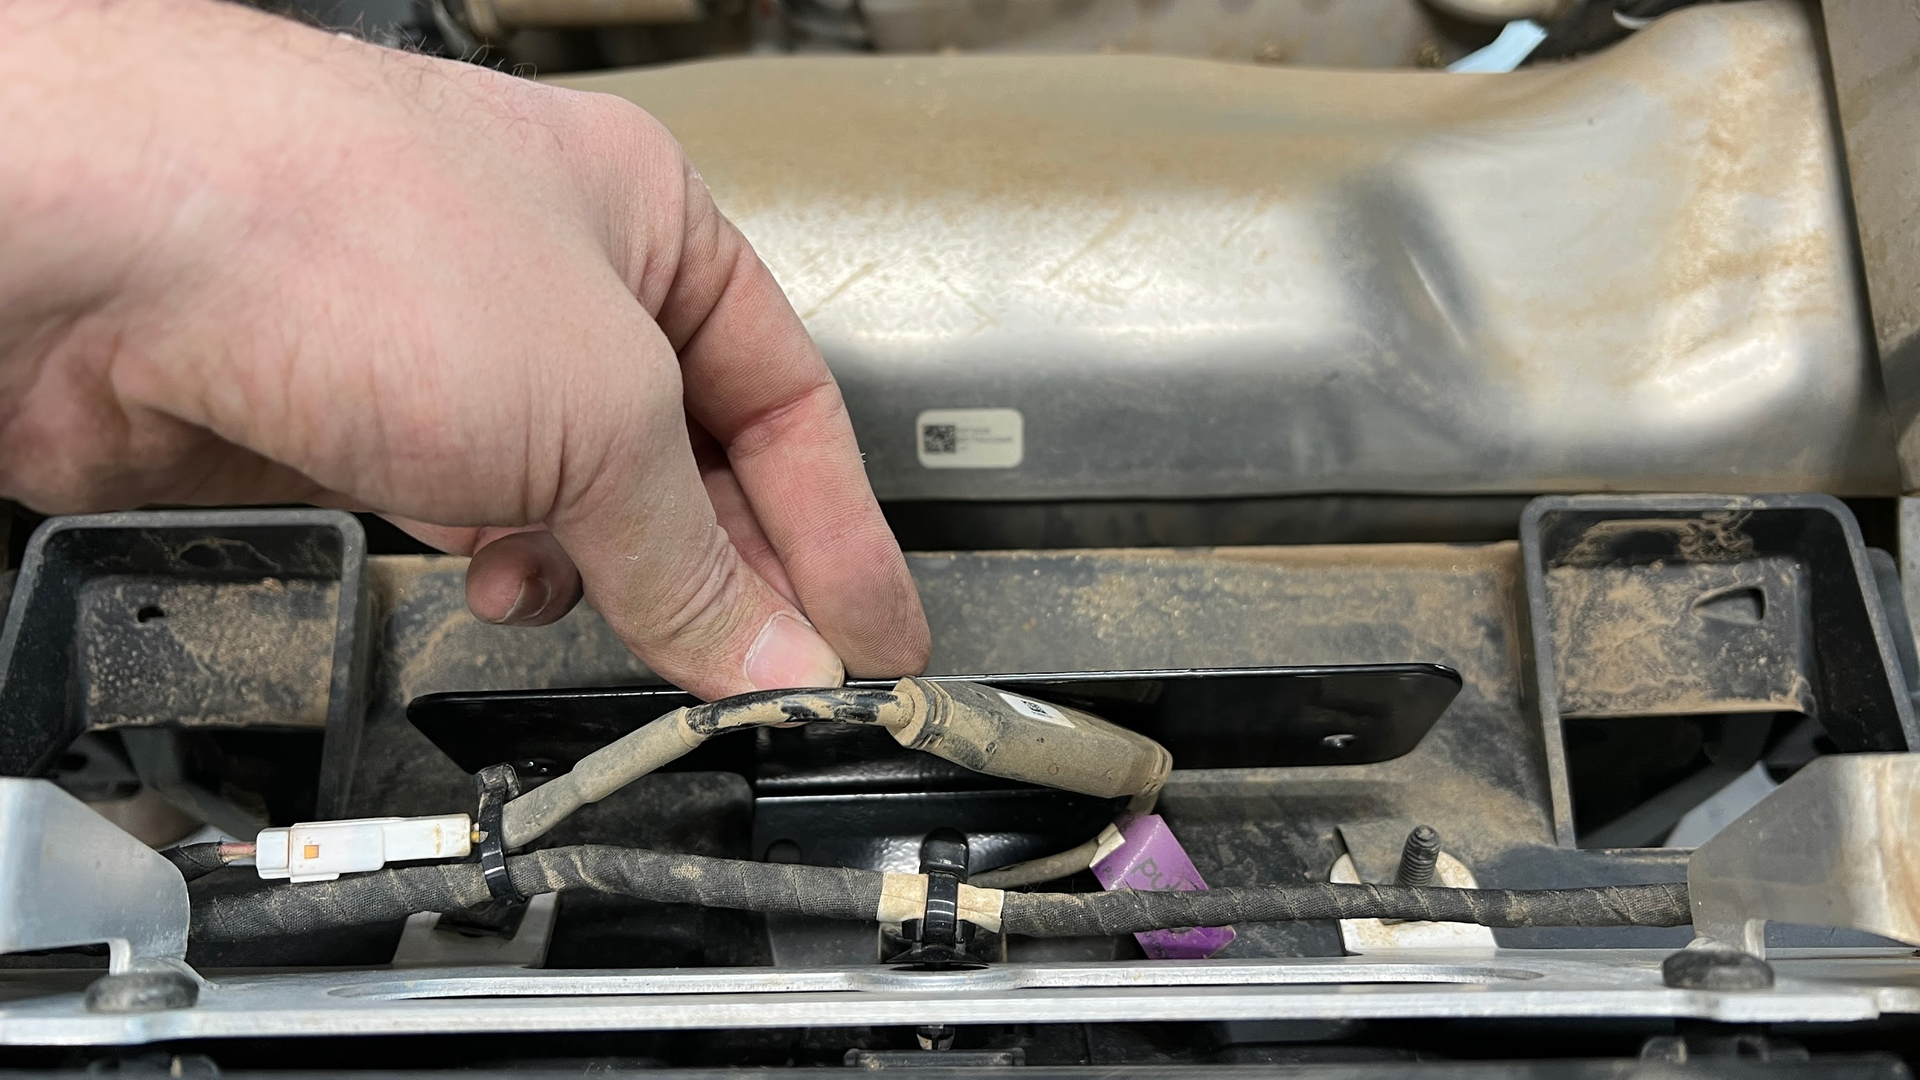
This is where I opted to mount the horn, there's a nice little hollow spot that you can get too in that little nook that the horn fits in nicely, You will have to rotate the horn and fiddle with it a little to see how it fits in there the best.
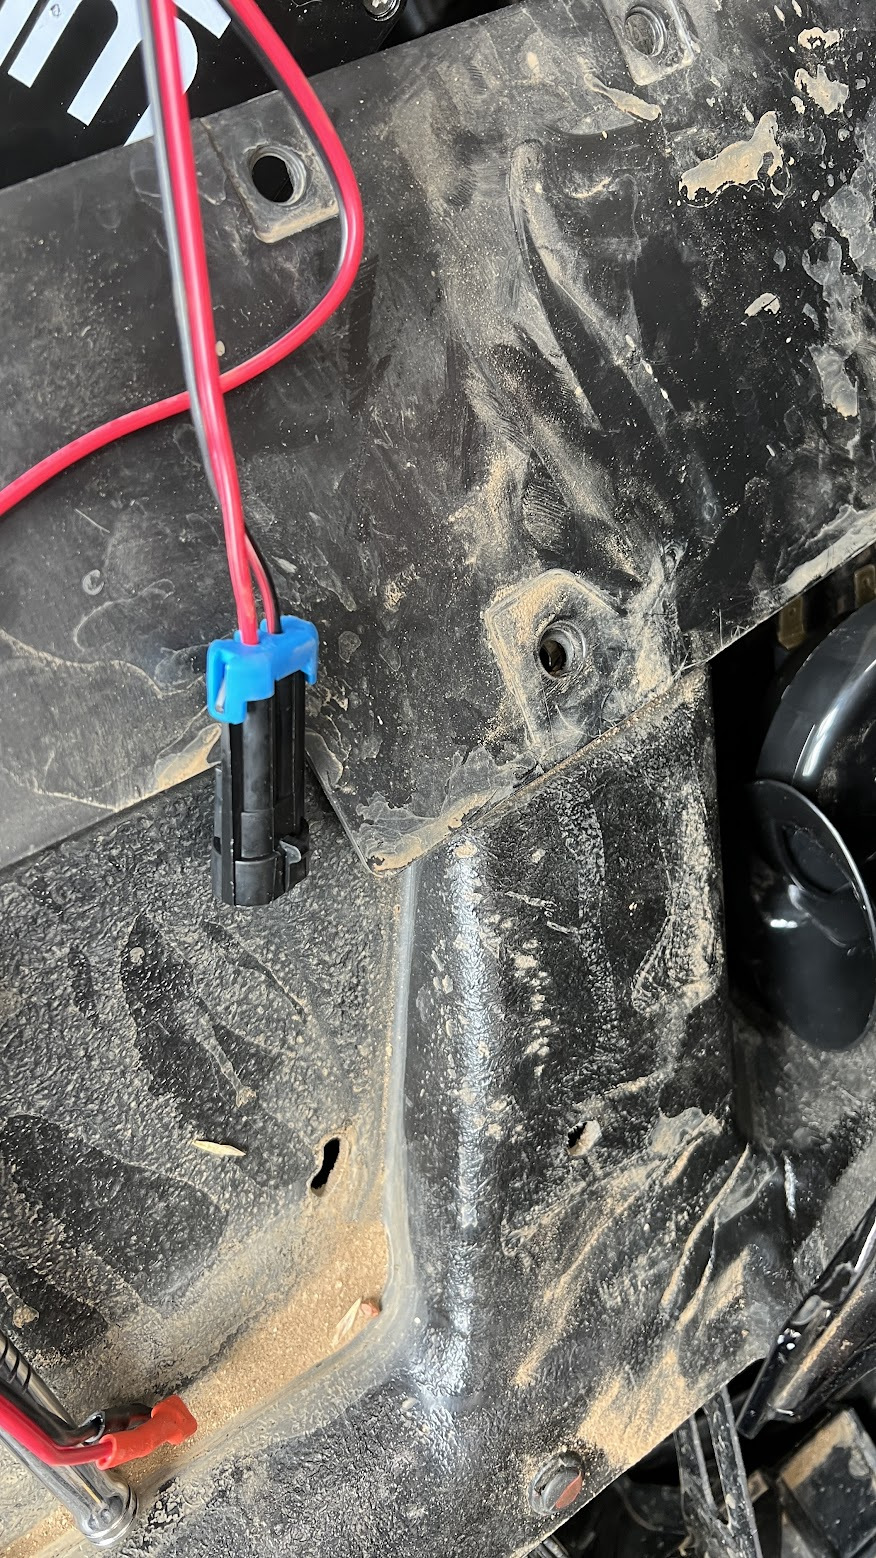
The horn ends up being right under this part of the hood/fender right behind where the factory wrote "008". You can just pry the plastic up a little and shove the horn in. Mark a spote for a hole and drill it for the horn's stud to go through.

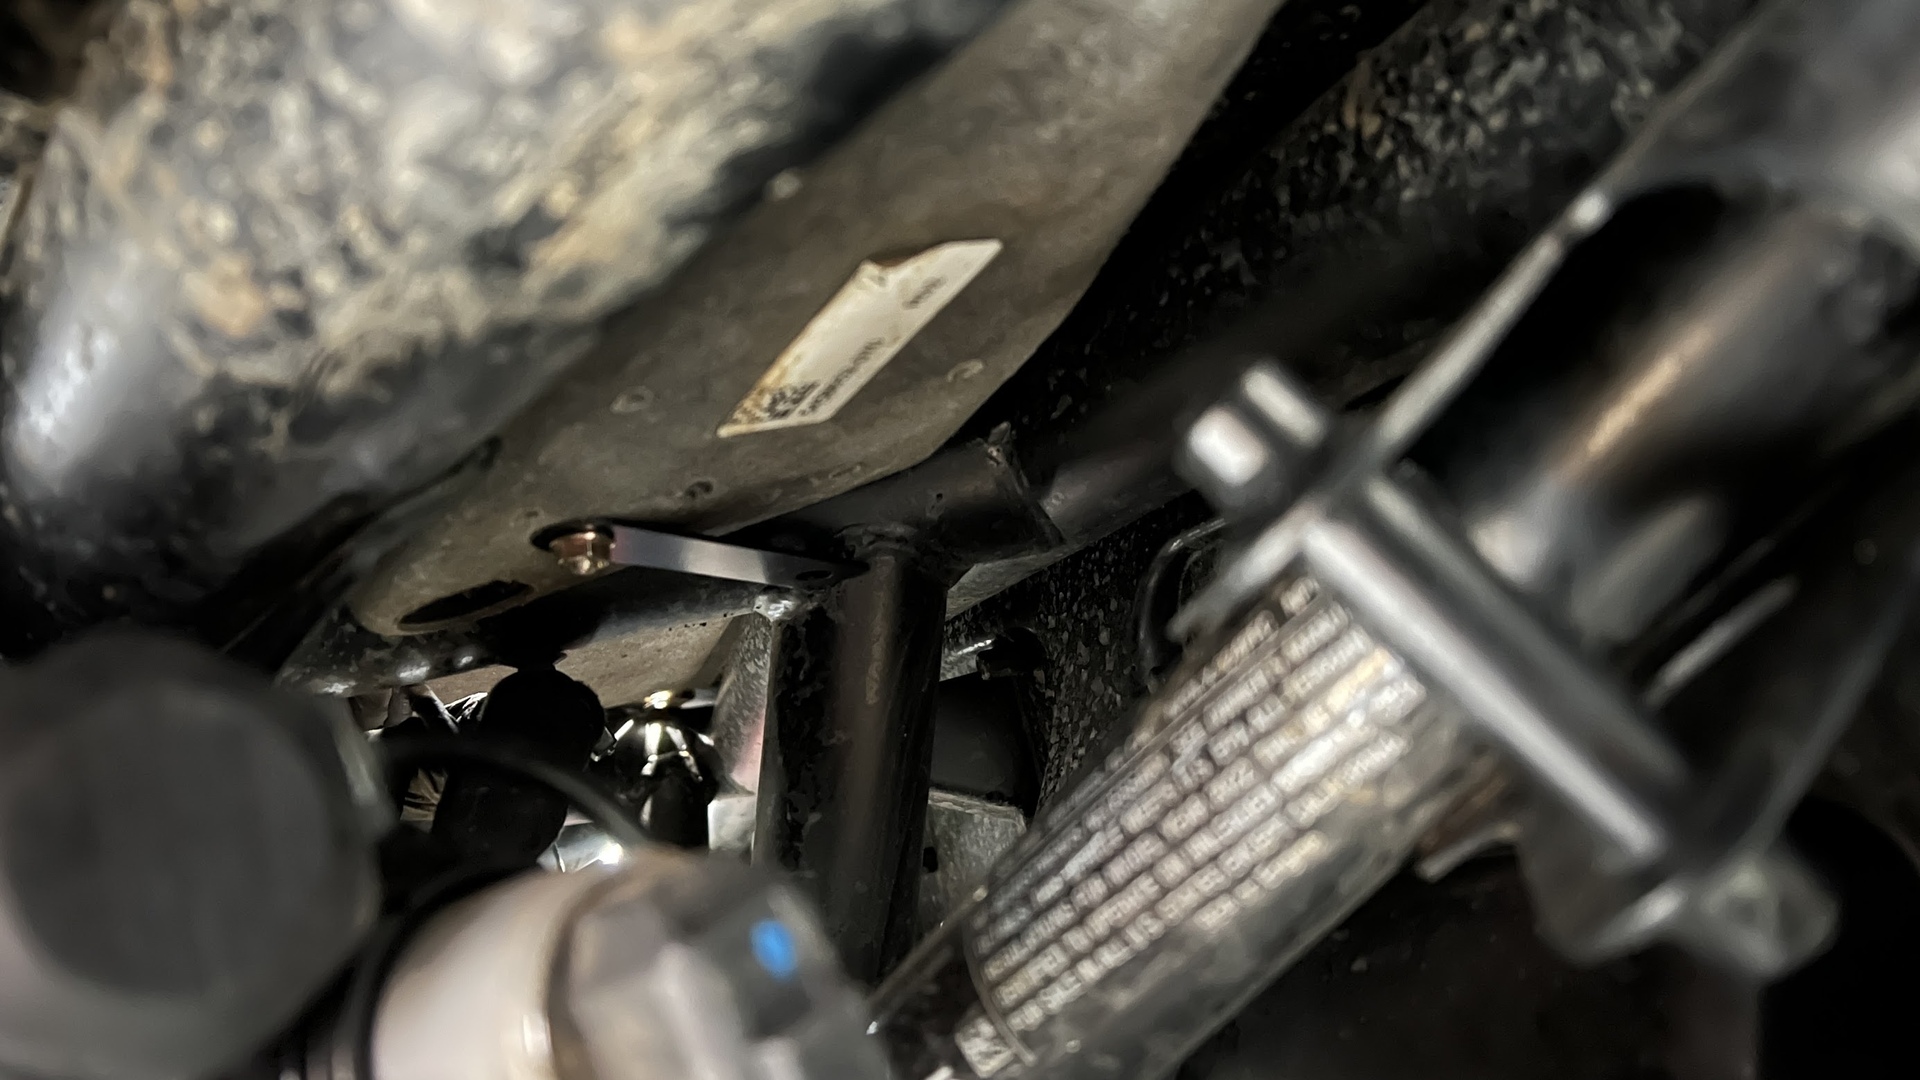
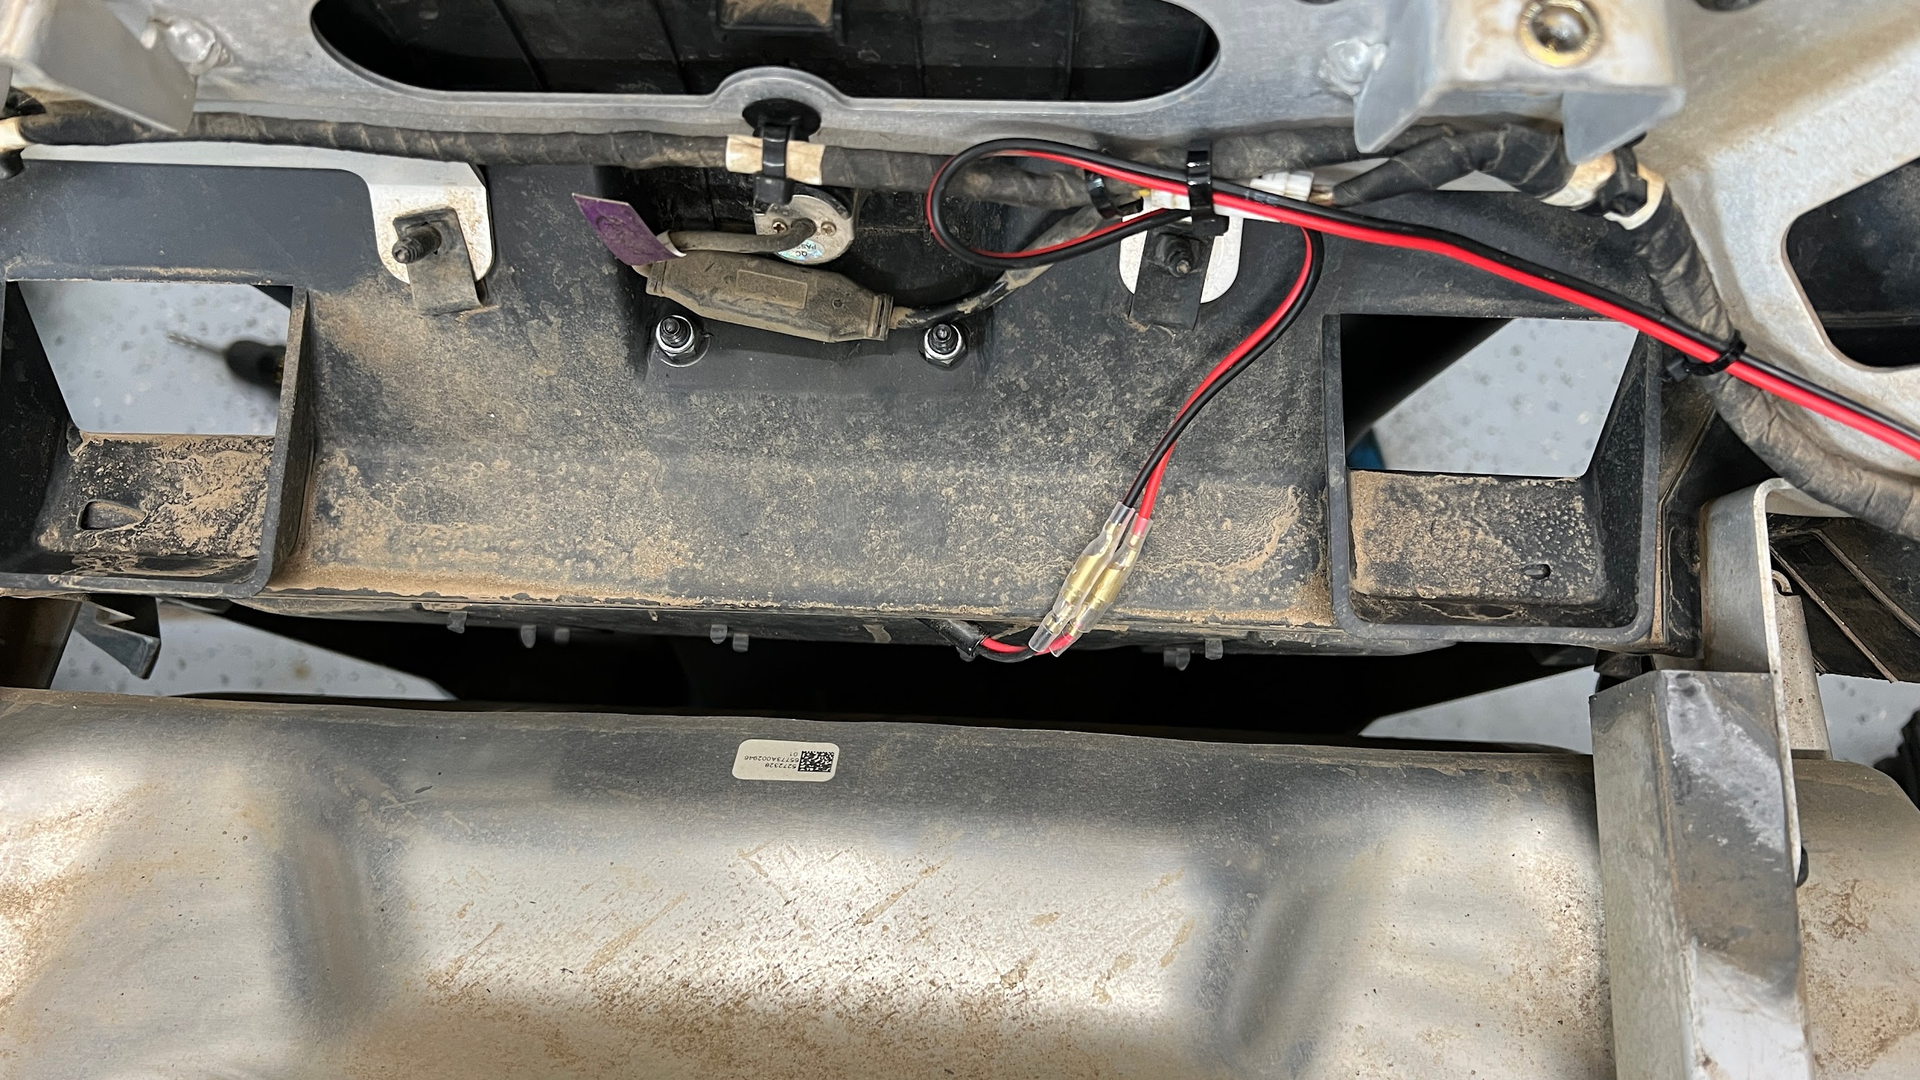
Here you can see the threaded stud from the horn where it comes through. I just used the bracket as kind of a washer for more surface area on the plastic the stud comes through.
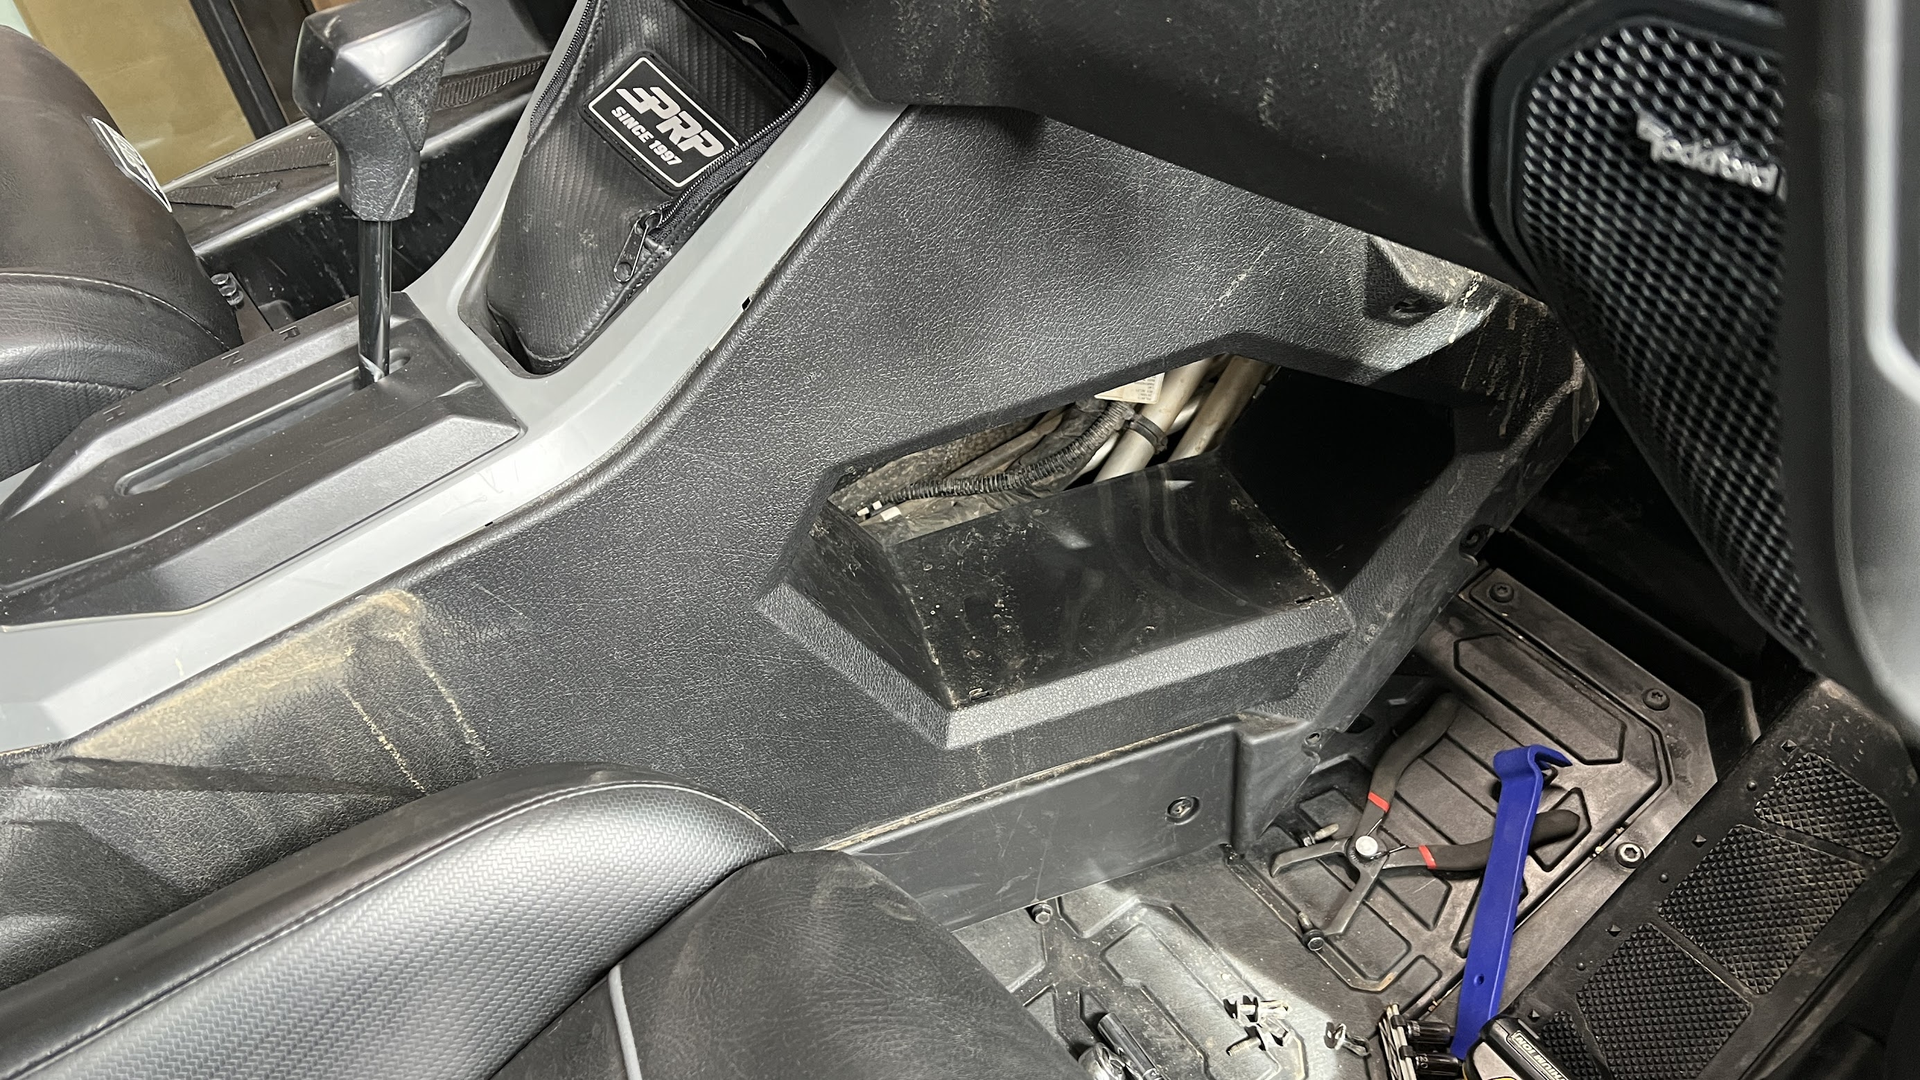
Running the wires back to the back of the machine is one of two real painful parts of the job. I found that removing all the push pins and bolts on the right side of the console allowed me to pry the side of the console out enough to get the wires up under it, then I was able to feed them up to the console. I pulled the console tray out and fed them the rest of the way back to the engine compartment area.
I wrap the loose wires at the end of the harness with some electrical tape. This keeps them all together and makes it less likely they snag on something feeding them through the tunnel and back to the back of the machine.
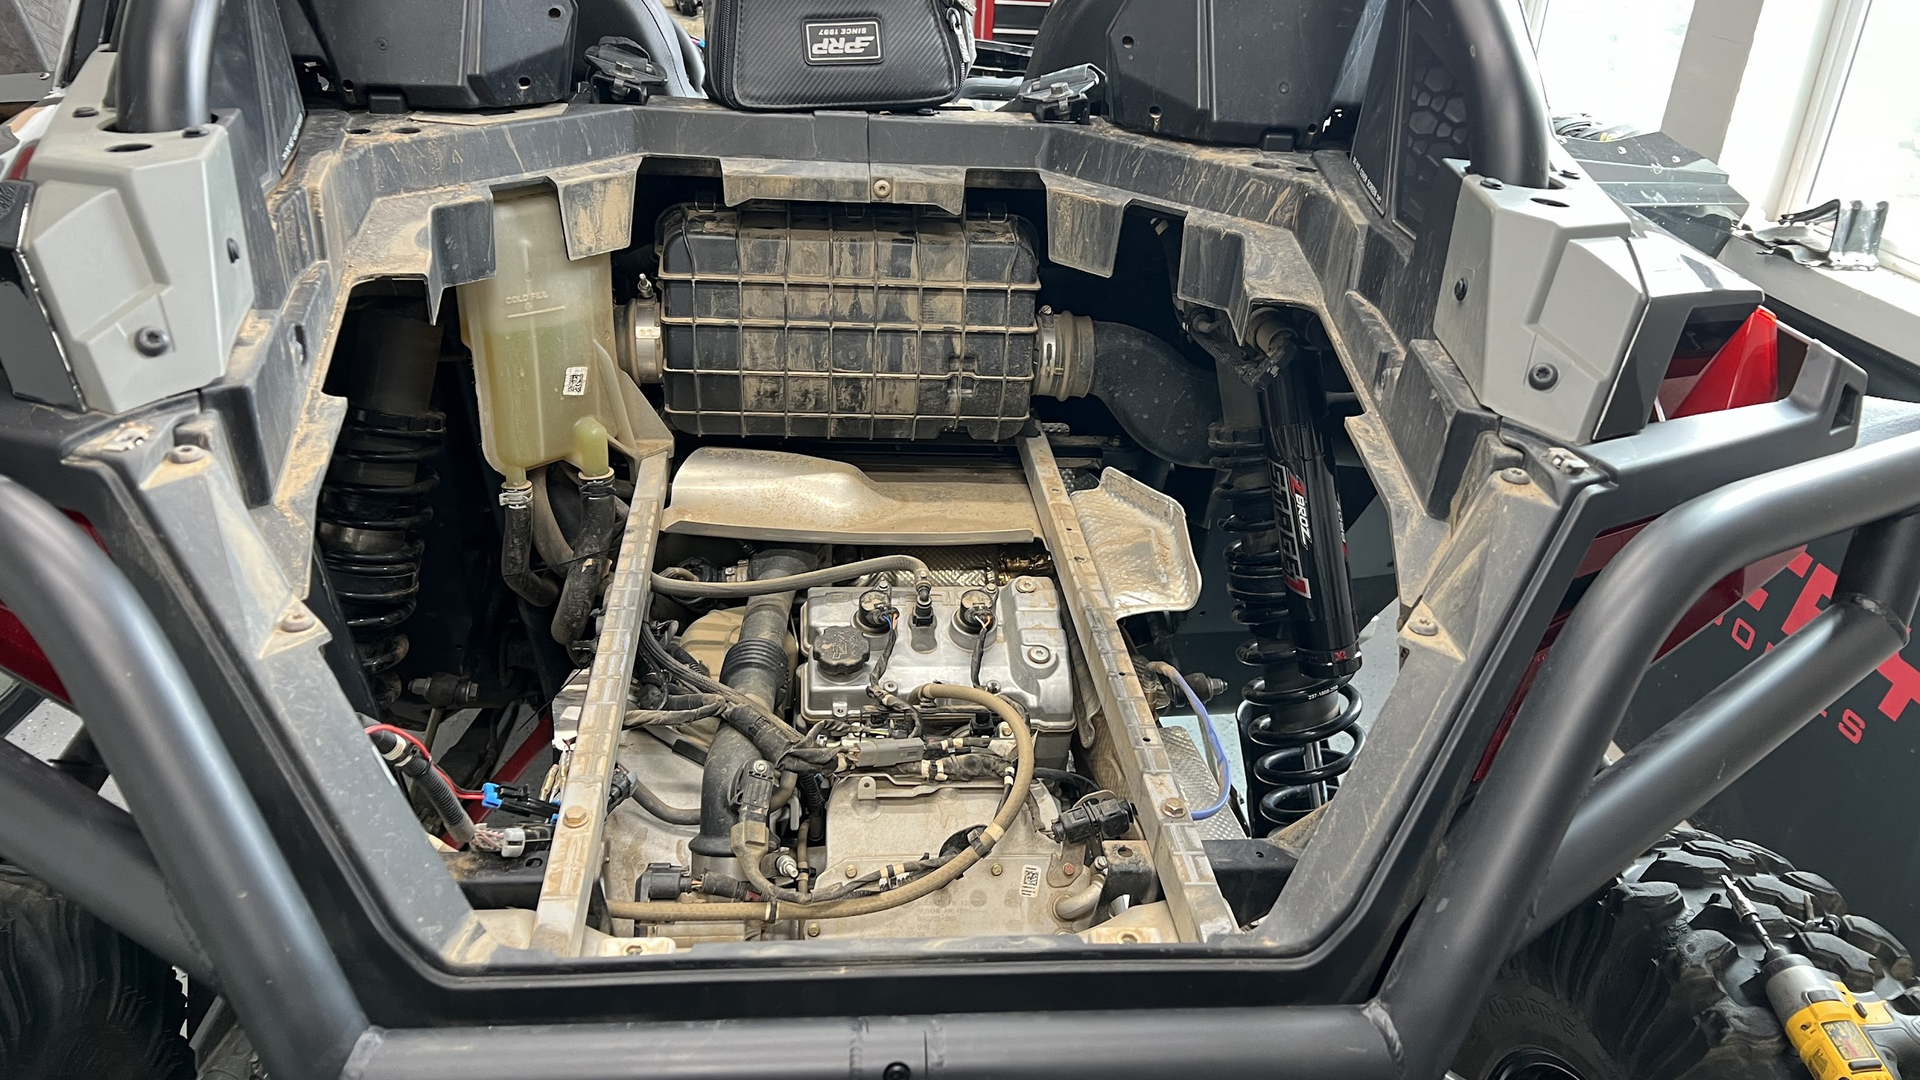
Definitely pop the bed out once you get the wires to the back of the machine, this will make life easier. This is a good time to inspect the hoses, wires, connectors, charge tube, radiator fluid levels etc while the bed is out.
This is what the inline plug looks like once installed into the factory wiring harness.
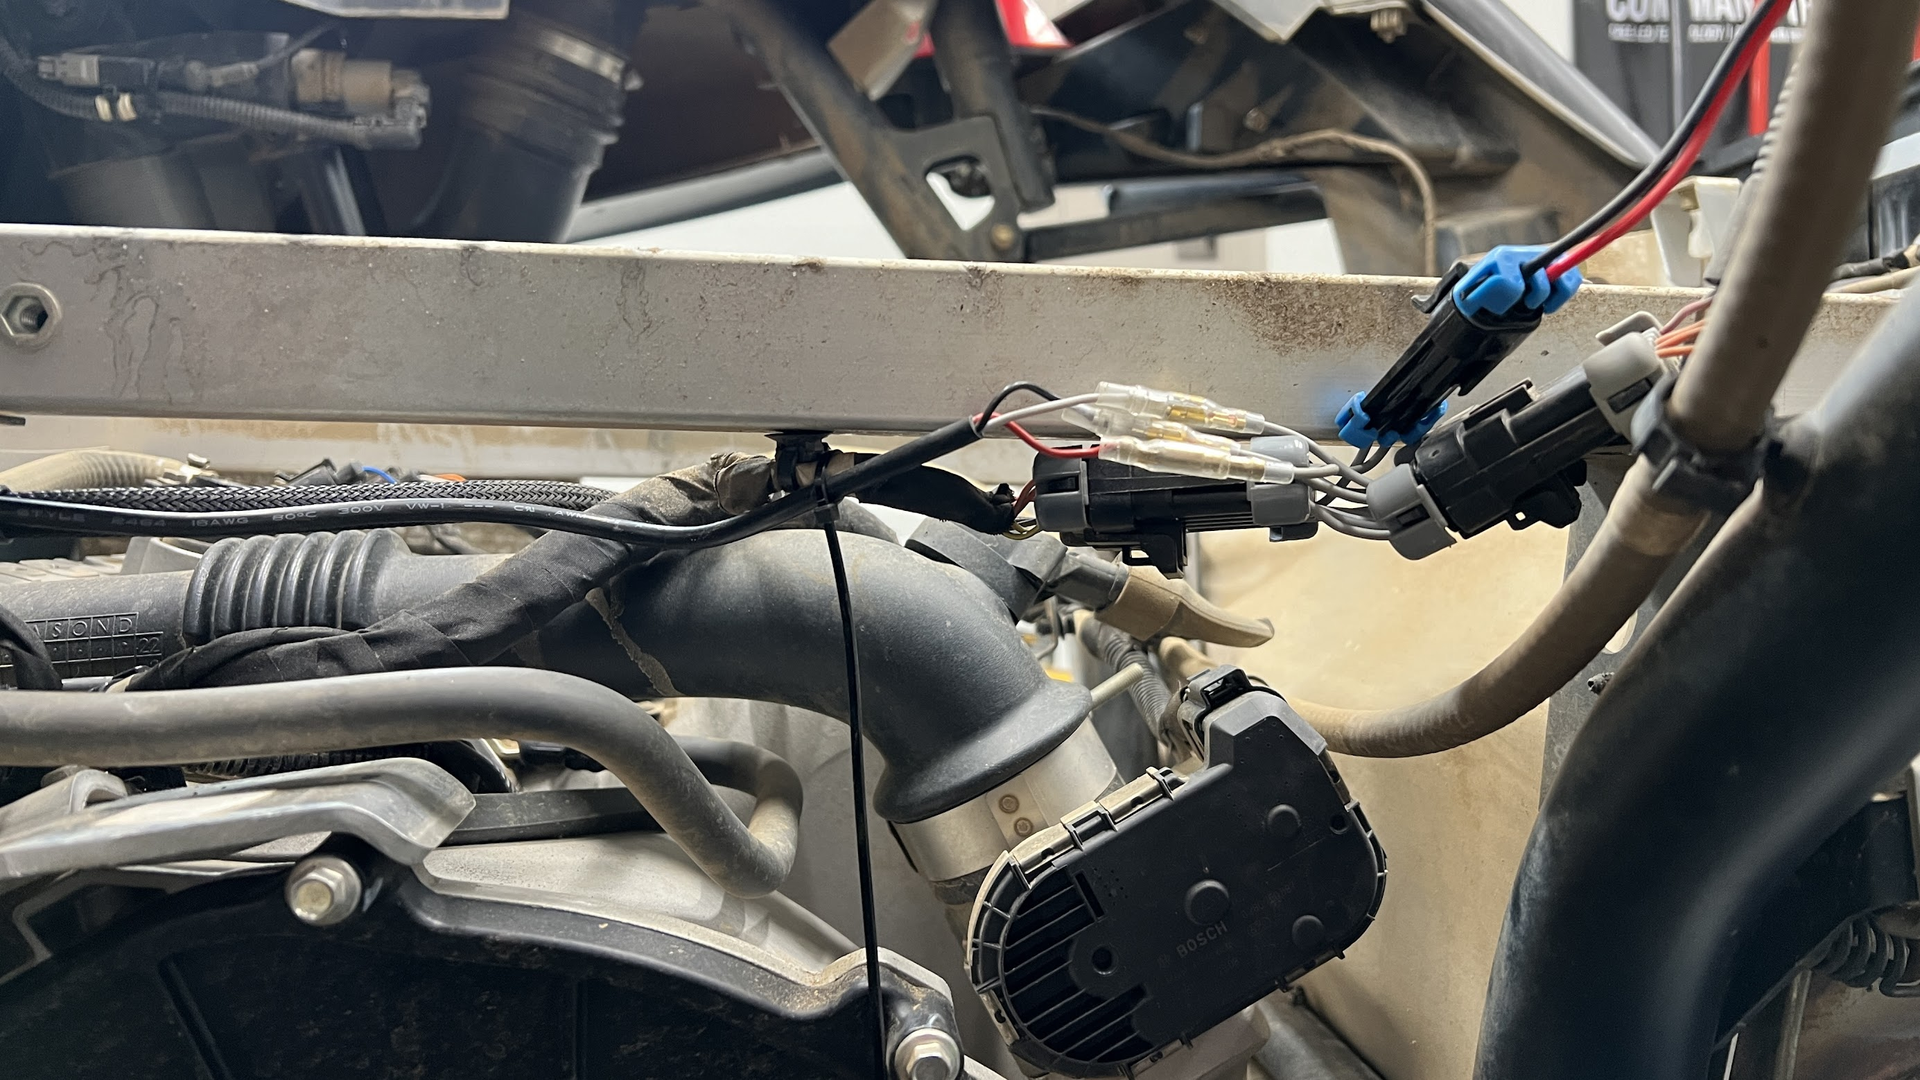
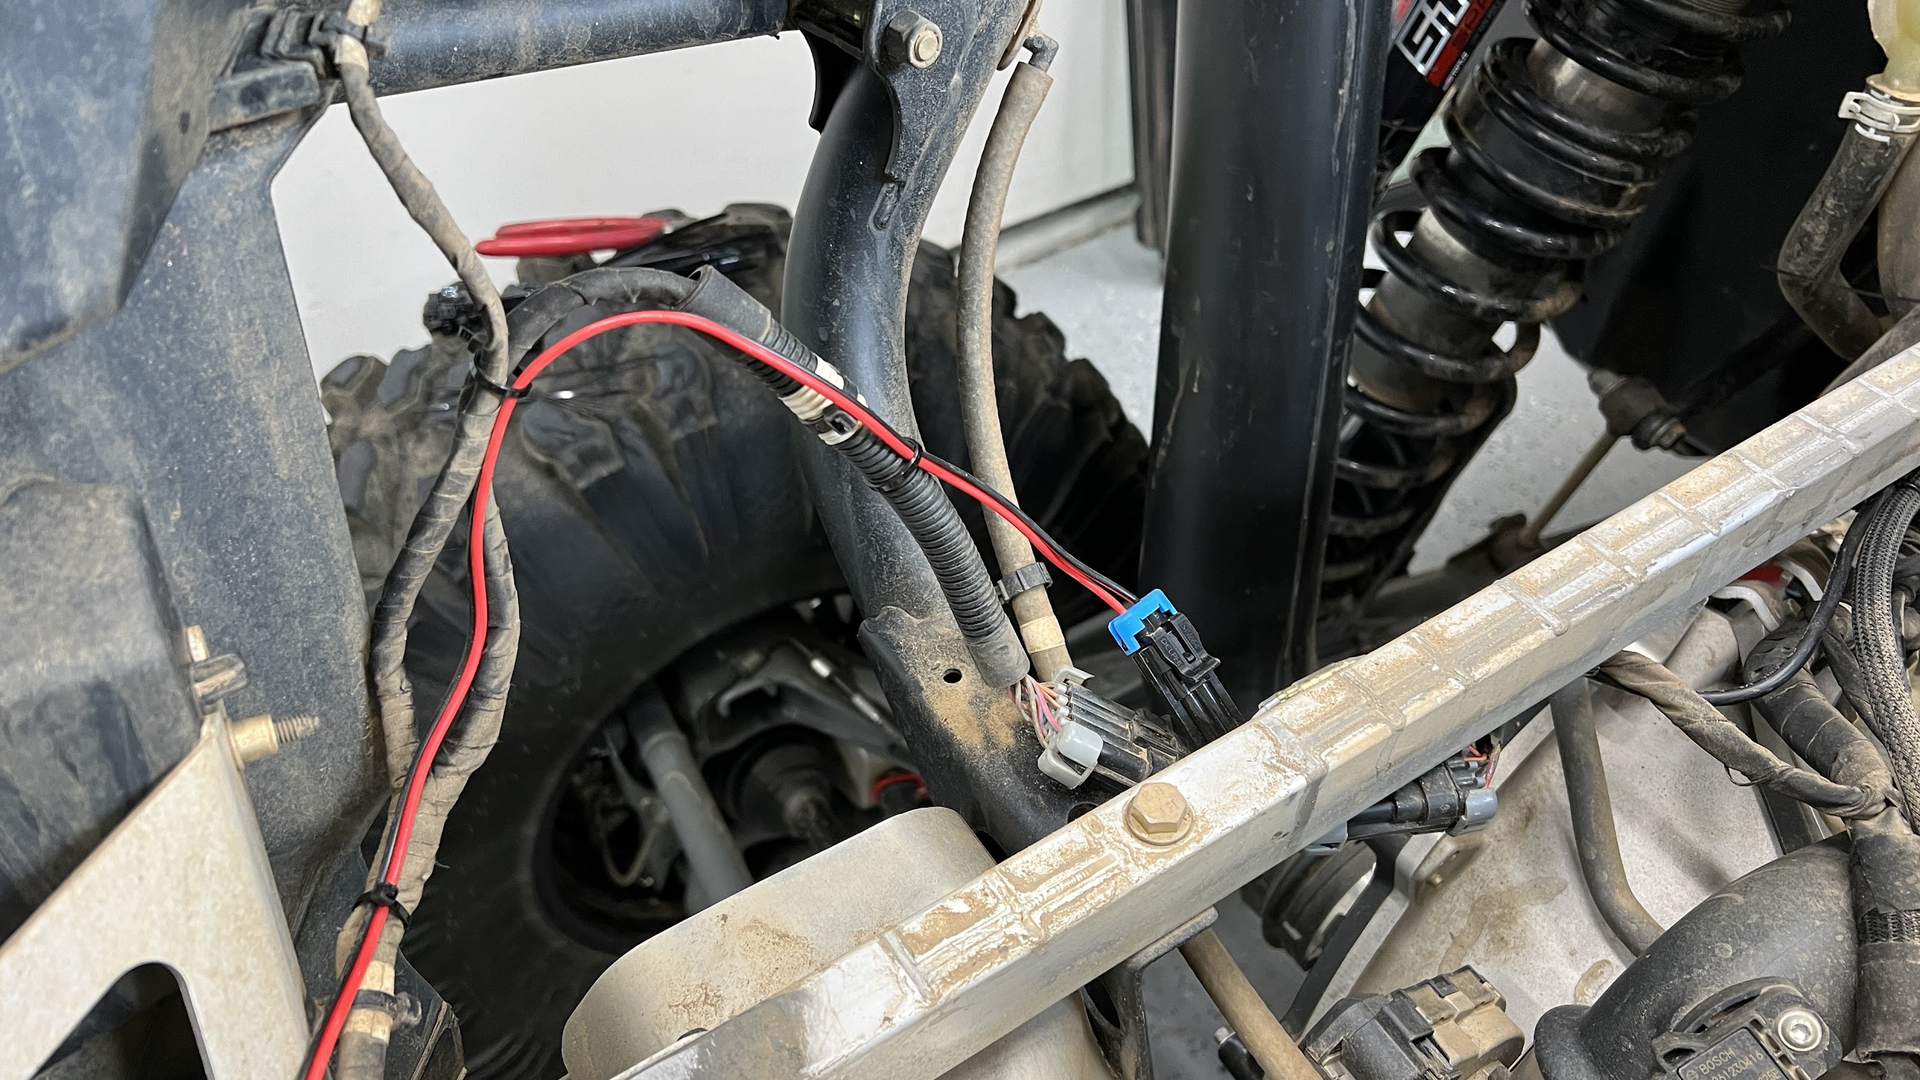
Here's a view from the top. I attached the red wires with the supplied zip ties to the existing harness and routed them on the inside of the factory harness to they wouldn't be as noticeable from when looking at them. You could get some larger wire loom and go over top of both. That would probably look better.
Here's how I opted to mount the license plate and bracket. You may notice my tag was expired, I got the updated one the day before I had to leave!

Instead of trying to mark the holes from the outside/bottom of the plastic fascia where I wanted the license plate, I took the bracket and set it in from the top side and used a sharpie to mark my drill holes. I also drilled down from the top. This make it much easier to align and drill the holes perfectly straight for the license plate bracket.
Here's what it looks like from the top with the wires routed and the bracket bolted on.
This is a slight annoyance but not a big deal. Due to the way the wiring sticks out of the back of the LED lighted bracket, the license plate fits in better if you cut a little notch out of the license plate for the wires.
Getting the old headlights out and the new ones in is the most difficult part of this job. It's like some kind of horrible puzzle to get them in an out. Getting to the screws that hold them in place also isn't the easiest. The grille also has to be removed to get to the ones on the inner corners of the lights. I left the protective plastic on the new lights while I worked them in to limit them from getting scratched.

I think the instructions have you mount the control box at the beginning of the job but I left it laying on the hood area until I had all of the wiring in place. I found two screws in my pile of leftover fasteners that have the extra wide threads on them. I should have taken a pic of them but they looks similar to this:

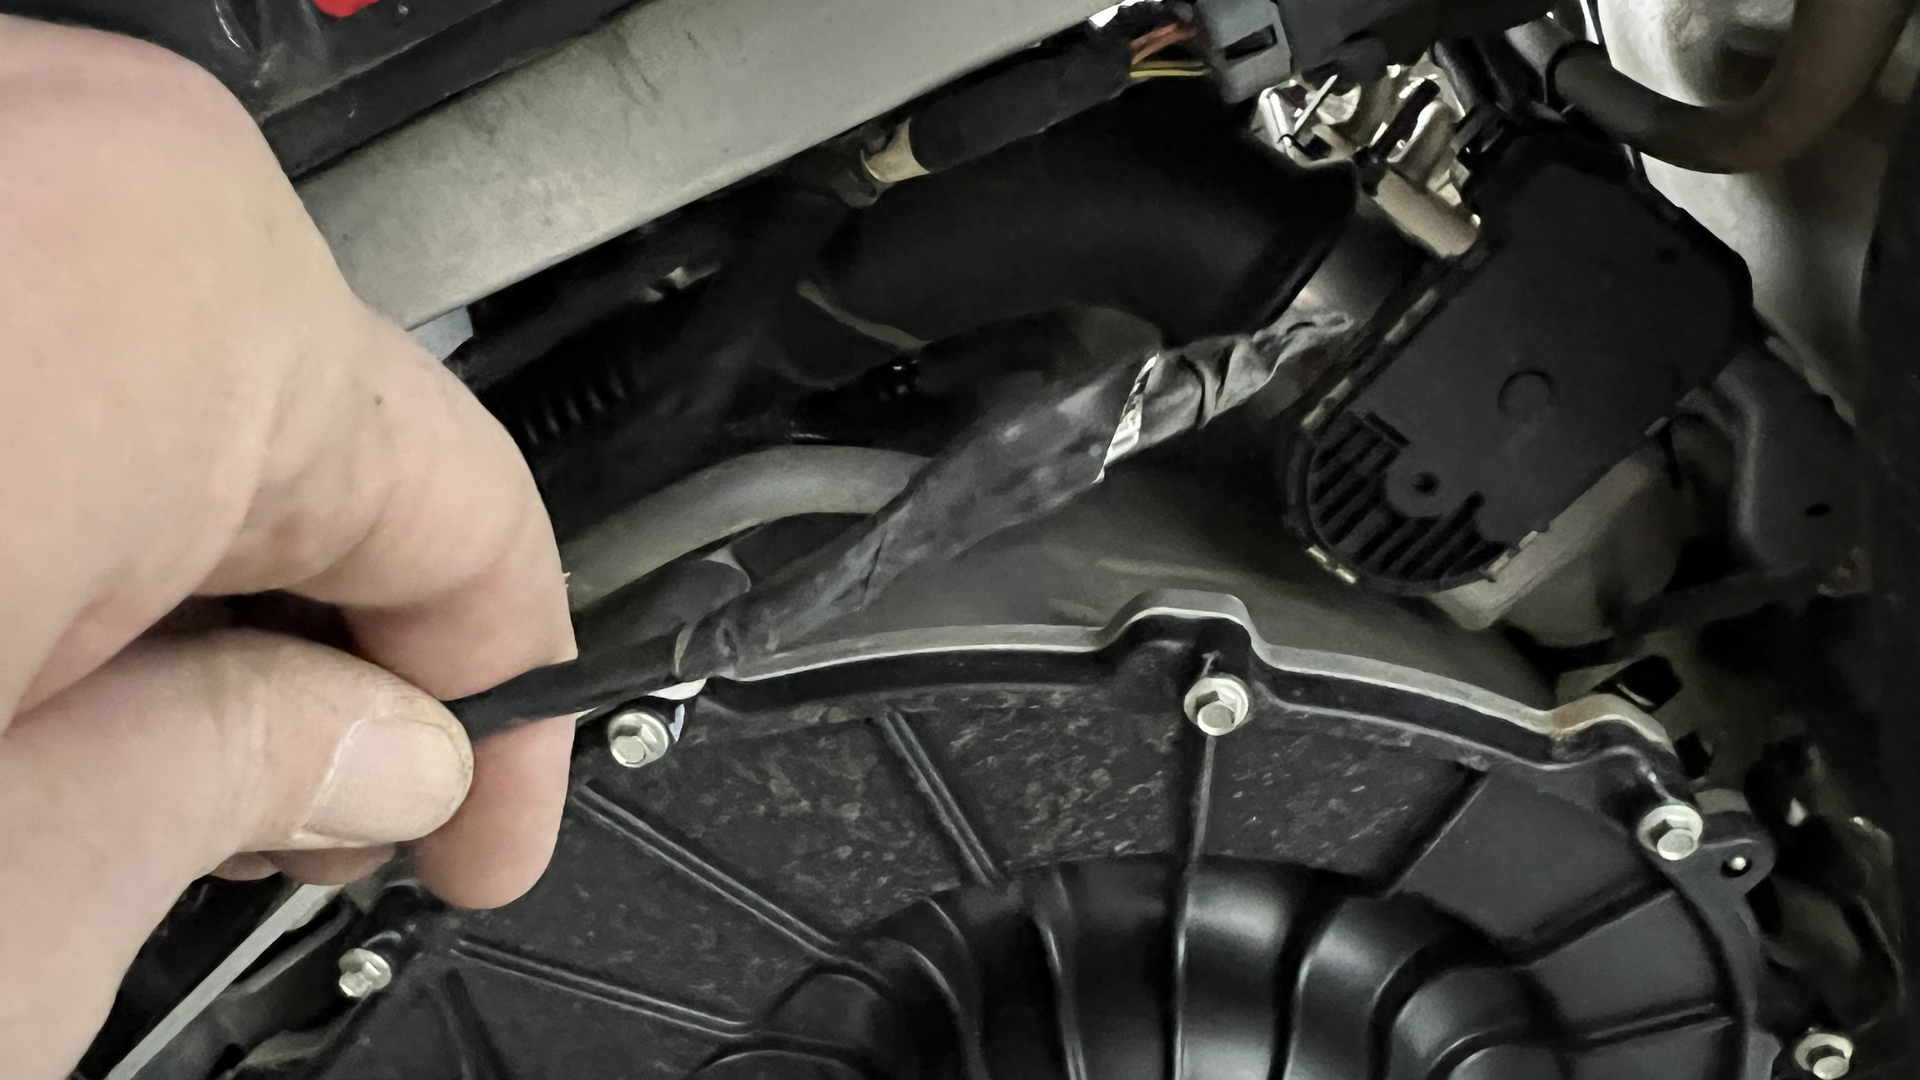
I used this handy tool:

Then attached the control box to the firewall like this:
There are a lot more steps in the actual instructions but thought it might be helpful to document some of the things that are left open to some interpretation. Hope this was helpful to some folks. Please consider ordering your WD Street legal kit from us here at RockPeak UTV, a supporting forum vendor on rzrforums.net!
Oh and once you start testing everything, if a rear blinker or the LED license plate frame doesn't light up, the polarity may be reversed. You might have two swap the bullet connectors around that are right under the bed. I have found LEDs in general do not work with the positive and negative polarity reversed where old bulbs really didn't care.
I get a lot of questions about the replacement headlights, other than the wire to trigger for the integrated blinkers, they look damn near identical to the stock headlights right down to the molding markings. WD claims they are 10% brighter than stock but I didn't get a chance to compare them side by side in the dark with another Turbo R to see.

Close up of the control box. Everything has nice weather pack connectors, the bullet connectors are for the power and there is an included pigtail for the bus bar that has bullet connectors installed so it is truly plug and play.

This is where I opted to mount the horn, there's a nice little hollow spot that you can get too in that little nook that the horn fits in nicely, You will have to rotate the horn and fiddle with it a little to see how it fits in there the best.

The horn ends up being right under this part of the hood/fender right behind where the factory wrote "008". You can just pry the plastic up a little and shove the horn in. Mark a spote for a hole and drill it for the horn's stud to go through.

Here you can see the threaded stud from the horn where it comes through. I just used the bracket as kind of a washer for more surface area on the plastic the stud comes through.

Running the wires back to the back of the machine is one of two real painful parts of the job. I found that removing all the push pins and bolts on the right side of the console allowed me to pry the side of the console out enough to get the wires up under it, then I was able to feed them up to the console. I pulled the console tray out and fed them the rest of the way back to the engine compartment area.

I wrap the loose wires at the end of the harness with some electrical tape. This keeps them all together and makes it less likely they snag on something feeding them through the tunnel and back to the back of the machine.

Definitely pop the bed out once you get the wires to the back of the machine, this will make life easier. This is a good time to inspect the hoses, wires, connectors, charge tube, radiator fluid levels etc while the bed is out.

This is what the inline plug looks like once installed into the factory wiring harness.

Here's a view from the top. I attached the red wires with the supplied zip ties to the existing harness and routed them on the inside of the factory harness to they wouldn't be as noticeable from when looking at them. You could get some larger wire loom and go over top of both. That would probably look better.

Here's how I opted to mount the license plate and bracket. You may notice my tag was expired, I got the updated one the day before I had to leave!

Instead of trying to mark the holes from the outside/bottom of the plastic fascia where I wanted the license plate, I took the bracket and set it in from the top side and used a sharpie to mark my drill holes. I also drilled down from the top. This make it much easier to align and drill the holes perfectly straight for the license plate bracket.

Here's what it looks like from the top with the wires routed and the bracket bolted on.

This is a slight annoyance but not a big deal. Due to the way the wiring sticks out of the back of the LED lighted bracket, the license plate fits in better if you cut a little notch out of the license plate for the wires.

Getting the old headlights out and the new ones in is the most difficult part of this job. It's like some kind of horrible puzzle to get them in an out. Getting to the screws that hold them in place also isn't the easiest. The grille also has to be removed to get to the ones on the inner corners of the lights. I left the protective plastic on the new lights while I worked them in to limit them from getting scratched.

I think the instructions have you mount the control box at the beginning of the job but I left it laying on the hood area until I had all of the wiring in place. I found two screws in my pile of leftover fasteners that have the extra wide threads on them. I should have taken a pic of them but they looks similar to this:

I used this handy tool:

Then attached the control box to the firewall like this:

There are a lot more steps in the actual instructions but thought it might be helpful to document some of the things that are left open to some interpretation. Hope this was helpful to some folks. Please consider ordering your WD Street legal kit from us here at RockPeak UTV, a supporting forum vendor on rzrforums.net!
Oh and once you start testing everything, if a rear blinker or the LED license plate frame doesn't light up, the polarity may be reversed. You might have two swap the bullet connectors around that are right under the bed. I have found LEDs in general do not work with the positive and negative polarity reversed where old bulbs really didn't care.